Written By Tenaui Middle East
2024-05-20
Do you find the initial setting of your Epson printer with Epson Connect services a hassle? Worry not; you have come to the right spot. The following is a complete guide to the Epson Connect printer setup, which guarantees that with the steps below, your printer will be well-positioned to provide a quality printing service.
Additionally, brief guidelines exist for the initial setup steps to prepare and message the content on solving commonly encountered issues. We shall also briefly describe the overall actions of the Epson printer setup and the most common issues.
What is Epson Connect?
Epson Connect is an assortment of cloud-based services that lets you print your documents and photos and scan them from your desired system, placed on the globe. You may utilise the Epson Email Print, Epson iPrint, Remote Print, and Scan to Cloud capabilities to email your print jobs to your printer, print from a distance using the Epson iPrint app, and scan to a cloud storage service like Google Drive and Dropbox. When it comes to using your laptop, tablet, or smartphone, printing important papers on the go has never been this simple!
Why Choose Epson Connect?
Epson Connect is a great option for personal and business printing because of its many advantages. Here are some reasons to think about utilising Epson Connect:
1. Convenience:
You do not have to worry about connecting with Epson Connect; any gadget will work fine. All is ready and more than simple and convenient; you need to connect to a smartphone, a tablet, or a laptop and go. The following mobile printing apps are the most popular: Epson iPrint, Email Print, and Remote Print; they all enable easy and timely printing.
2. Flexibility:
Print from anywhere on the go with Epson Connect. You can print from anywhere, from home, work, or while on the move, via email or even remotely from cloud storage services, including Google Drive, Dropbox and Microsoft OneDrive. Most Epson printers have this service enabled so you can access additional services from any Epson-compatible printer, regardless of your brand.
3. Efficiency:
Epson Connect helps you minimise your distracted workflow through cloud printing. It enables you to print and scan documents straight to and from cloud services without any time-consuming steps. With the service, you can count on fast, dependable printing, and your printer has automatic firmware updates with cutting-edge features and security enhancements.
4. Enhanced Productivity:
Epson Connect is perfect for collaborative work environments since it allows several users to transmit print jobs to a single printer, increasing efficiency. Scheduled printing is one feature that can help you better manage your workload by printing documents automatically at predetermined intervals.
5. Environmentally Friendly:
Epson Connect’s preview feature, which lets users make necessary edits before printing, reduces paper waste. Epson printers offer a dependable and environmentally sustainable printing option while lowering your overall carbon footprint thanks to their energy-efficient design.
Getting Started With Epson Connect Printer Setup
Understanding the benefits of Epson Connect must have left you wanting to set it up and experience it yourself. You must have decided moments ago. Setting it up is simple, and in no time, you can print from anywhere and from any device. So, let us begin by setting up your Epson Connect Printer.
Step 1: Check Printer Compatibility
Before you begin, ensure your Epson printer is compatible with Epson Connect services. Although most modern Epson printers include this feature, it’s a good idea to double-check. Compatibility can be verified on the Epson website.
Step 2: Install the Printer
- Unbox and Assemble: Open the Epson package and assemble the printer according to the provided user manual. There is an illustrated manual that is easy to follow.
- Power Up: Plug into an electric power source and turn the printer on to start using it. Install Ink Cartridges. The ink cartridges might be installed differently depending on the model. Therefore, refer to the manual when installing your cartridges.
- Load Papers: Open the paper tray and load papers according to the paper size. Generally, they all have the same installation process.
Step 3: Connect to the Network
- Wired Connection: Use an Ethernet wire to connect your printer to your router.
- Wireless Connection: Choose your Wi-Fi network from the network settings on the printer’s control panel. Then, enter the password to connect.
Step 4: Install Epson Printer Software
- Download Software: Select your printer model and download the Epson Printer Driver and Epson Connect Printer Setup Utility from the Epson support website.
- Configure the program: Open the downloaded files, then follow the on-screen instructions to install the software on your computer.
Setting Up Epson Connect
It’s time to set up your printer to get the most out of Epson Connect now that you’re ready to get going. Follow these simple steps to register your printer, create an Epson Connect account, and customise available services.
Step 1: Register Your Printer with Epson Connect
The Epson Connect Printer Setup Utility you installed above should be launched. Click on the License Agreement to agree. Choose Printer Registration and click Next. Make sure the printer is on the same network as the computer. Once done, follow all the instructions on your screen; this registration will allow your printer to access Epson Connect services.
Step 2: Create an Epson Connect Account
If you do not have an Epson Connect account, you will need to sign in by providing your email and passing the password process, thus receiving a letter of agreement. Further, your account should be activated by clicking on the link in the message to log in and register a printer with the provided unique ID. This setup permits you to control a printer and its service remotely.
Step 3: Configure Epson Connect Services
Assign your printer an email address to set up Epson Email Print, which lets you print files from an email. Similarly, turn on Remote Print to print files from anywhere with the Epson iPrint app or the Epson Remote Print driver. Finally, scan and store documents and photos in the cloud by activating Scan to Cloud, which links to cloud services like Google Drive or Dropbox.
How to Set Up an Epson Printer?
Adhere to these procedures to set up your Epson printer seamlessly so you can start printing immediately.
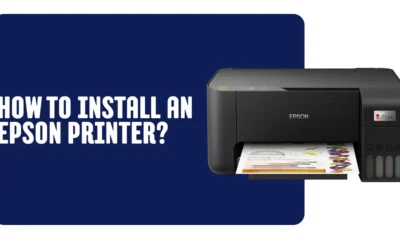
- Unbox and Assemble: Open the Epson printer packaging and read the user manual to help you assemble the hardware correctly. Check out the components, including the power cord, ink cartridges, and paper tray.
- Power Up: Connect your printer and switch it on. It will guide you through the initial setup, including language selection and basic configurations.
- Install Ink Cartridges and Load Paper: Open the printer cover, place the ink cartridges in their respective slots, and lock them. Fill the paper tray with the right type and size of paper, making sure to align it properly.
- Connect to network: You can use a wired or wireless connection. To use a wired connection, take an Ethernet cable and attach the printer’s end to the router. In case of a wireless connection, visit the print’s control panel network settings and connect to your Wi-Fi router by typing the password.
- Install printer software: With the remaining terminal part of the model name, go to the Printers and Scanners tab on Epson’s official website. Check the boxes in this tab for the latest MFP scanner and network USB drivers. After downloading the software, follow the installer’s screen.
- Complete the setup: Now, follow all the instructions the program gives, and remember to configure the following settings, check print, and register with the Epson Connect service.
Troubleshooting Common Issues
Even with the most dependable technologies, problems can occasionally occur. Having troubleshooting skills can help you avoid wasting time and frustration. Here are some solutions for two common problems: print jobs not processing and printers not connecting to Wi-Fi.
1. Printer Not Connecting to Wi-Fi:
First and foremost, for network issues, go to network settings. Both the printer and computer must be on the same network. If the printer is not connecting to Wi-Fi, you can turn off and on your router, printer, and computer to solve the issue. The problem may also be caused by outdated printer firmware, which causes incompatibility with the network.
2. Print Jobs Not Processing:
Open the printer’s status is the first thing that comes to mind. The simplest reasons are that the printer is powered off or out of paper and ink. If it is not working, print or remove the printer from the print queue. If this does not rectify the problem, uninstall and reinstall the printer drivers. This fixes the problem if the printer does not work correctly because of corrupted drivers or programs that conflict with the printer.
Choose Epson Connect with Tenaui
Experience expert digital imaging solutions in the Middle East, South Africa, and Singapore, and benefit from more than 30 years of expertise. Tenaui offers TCO support and maintenance for all Epson printers to keep you up-to-date. Our flexible Epson Connect services guarantee maximum productivity and efficiency.
Whether in Dubai, Abu Dhabi, Sharjah, Ajman or almost every corner of the globe, Tenaui has the needed network. Select the ideal solution and strategy in Epson Connect with Tenaui.
Summary:
In conclusion, installing your Epson printer on Epson Connect is a simple procedure that makes printing easier and more convenient. By reading through the steps covered in this guide, you’re assured of accessing all of Epson Connect’s services, and you can get your printer working at your convenience, in any location and at any time.
If you experience problems, you can refer to the troubleshooting solutions offered and print at the touch of a button. Are you prepared to transform your printing experience? Contact Tenaui right now to see Epson Connect’s full commercial potential!


