How to Clean Canon Printer Head Manually?
Keeping your printer in perfect condition is essential for maintaining high-quality prints, especially if you rely on it for daily tasks. One of the most common issues users face is clogged or dirty print heads, which can lead to faded prints, streaks, or missing colors. Learning how to clean Canon printer head manually can help you fix these problems without professional repair. This simple maintenance task not only improves print quality but also extends your printer’s life. Whether you use your printer for home, office, or business purposes, understanding the correct cleaning process ensures consistent performance and avoids unnecessary downtime.
Why Cleaning the Canon Printer Head Is Important
The print head is responsible for transferring ink onto paper. Over time, ink residue and dust can block the nozzles, resulting in poor output.
When the print head is not clean, you may notice:
Faded or uneven prints
Missing lines or colors
Blurry text or images
Ink smudges on paper
Regular cleaning helps maintain sharp and vibrant prints while preventing costly repairs.
Signs That Your Printer Head Needs Manual Cleaning
Before jumping into the cleaning process, it’s important to identify when manual cleaning is necessary.
Common Warning Signs
The printer produces streaky or patchy prints
Nozzle check pattern shows gaps
Colors appear incorrect or inconsistent
Automatic cleaning does not fix the issue
If these issues persist even after running the built-in cleaning function, manual cleaning becomes the best solution.
Things You Need Before Starting
Before you begin, gather the following materials to ensure a safe and effective cleaning process.
Required Tools
Distilled water
Isopropyl alcohol (optional)
Lint-free cloth or paper towel
Cotton swabs
Gloves (to avoid ink stains)
Using proper materials prevents damage to delicate printer components.
Step-by-Step Guide to Cleaning Canon Printer Head Manually
Now, let’s go through the process of cleaning the Canon printer head manually, safely, and efficiently.
1. Turn Off and Unplug the Printer
Always start by turning off the printer and disconnecting it from the power source. This ensures safety and prevents electrical damage.
2. Open the Printer and Access the Print Head
Open the printer cover and wait for the cartridge holder to move to the center. Carefully remove the ink cartridges and place them on a clean surface.
3. Remove the Print Head
In most Canon printers, the print head can be removed by unlocking a lever. Handle it gently to avoid damaging the nozzles.
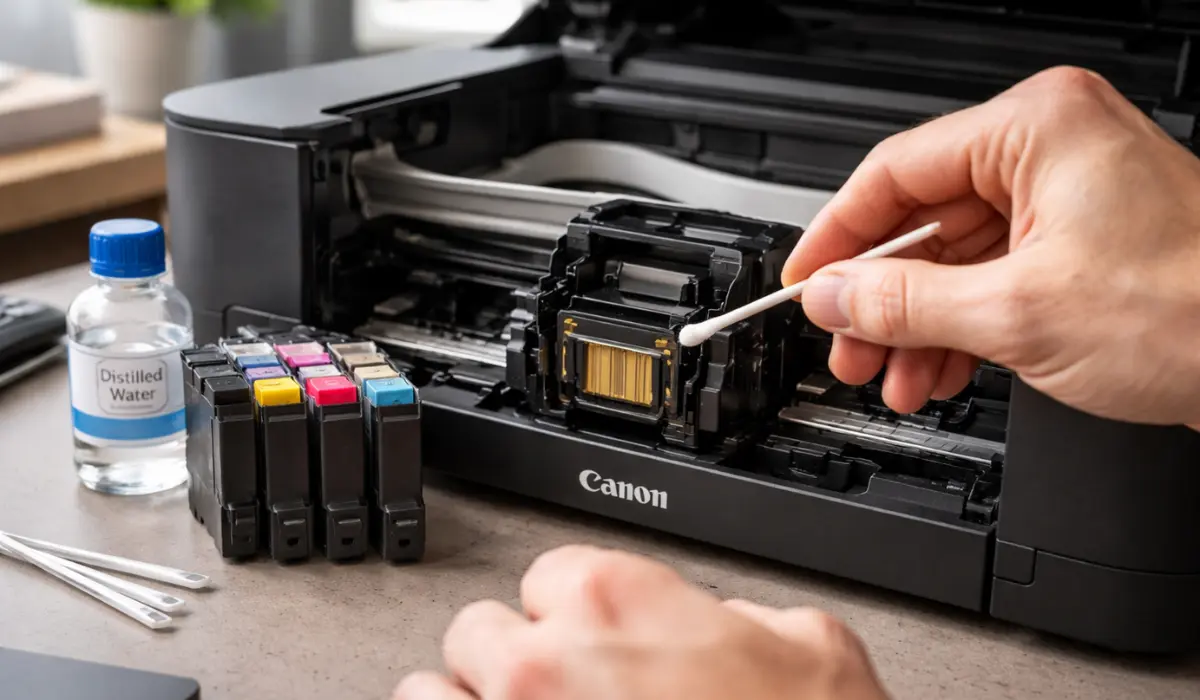
4. Clean the Print Head with Distilled Water
Dampen a lint-free cloth or cotton swab with distilled water. Gently wipe the print head surface and nozzles to remove dried ink.
Avoid using tap water as it may contain minerals that can damage the print head.
5. Use Isopropyl Alcohol for Deep Cleaning (Optional)
If the clog is stubborn, lightly use isopropyl alcohol on a cotton swab. This helps dissolve dried ink more effectively.
6. Dry the Print Head Completely
Let the print head air dry for at least 10–15 minutes. Make sure it is completely dry before reinstalling.
7. Reinstall and Test the Printer
Place the print head back into the printer, reinstall the cartridges, and close the cover. Run a test print or nozzle check to ensure the issue is resolved.
Tips to Prevent Print Head Clogging
Prevention is always better than repair. Follow these tips to keep your printer running smoothly.
Best Practices
Print at least once a week to prevent ink drying
Use original or high-quality ink cartridges
Keep your printer in a clean, dust-free environment
Turn off the printer properly after use
These simple habits can significantly reduce the need for frequent manual cleaning.
Manual Cleaning vs Automatic Cleaning
Canon printers come with an automatic cleaning feature, but it may not always solve the problem.
Key Differences
Automatic cleaning is quick but less effective for heavy clogs
Manual cleaning provides deeper cleaning but requires careful handling
Automatic cleaning uses more ink
Manual cleaning saves ink but takes more time
Choosing the right method depends on the severity of the issue.
Common Mistakes to Avoid
When performing manual cleaning, avoid these mistakes to protect your printer.
Using excessive force while cleaning
Applying too much liquid
Not drying the print head properly
Using rough or abrasive materials
Being careful during the process ensures long-term printer performance.
Conclusion
Understanding how to clean Canon printer head manually is a valuable skill that can save time, money, and frustration. Regular maintenance ensures your printer delivers high-quality prints without interruptions. By following the correct steps and using the right tools, you can safely remove clogs and restore your printer’s performance. Whether you are dealing with minor print issues or stubborn ink blockages, manual cleaning is an effective solution. Make it a habit to check and maintain your printer regularly, and you will enjoy consistent results and a longer lifespan for your device.
FAQs
1. How often should I clean my Canon printer head manually?
You should only clean it manually when automatic cleaning does not resolve print quality issues.
2. Can I use tap water to clean the print head?
No, distilled water is recommended to avoid mineral buildup and damage.
3. Is manual cleaning safe for all Canon printers?
Most Canon printers allow manual cleaning, but always check your model’s user manual.
4. What if manual cleaning does not fix the problem?
If the issue persists, the print head may need to be replaced or serviced by a professional.
5. Does manual cleaning improve print quality immediately?
In most cases, yes. After proper cleaning and testing, print quality should improve significantly.