How to Connect Canon Scanner to Computer? A Complete Step-by-Step Guide
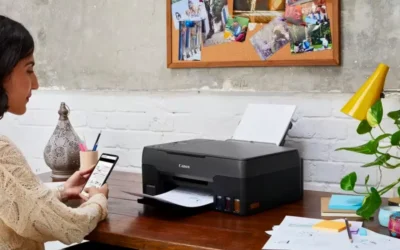
When you connect a Canon scanner to a computer, it can be daunting, particularly if you are doing it for the first time. However, once you sort out how it works, the process itself is quick and easy. When you’re setting up your new scanner, you’ll want to do it right the first time, and if you are using your scanner for important business documents, photos, or creative projects, doing it right the first time is even more important. In this article, we will tell you how to connect Canon scanner to computer, both by USB Connection and by wireless connection. Perhaps there is a problem connecting, and we will offer suggestions for fixing connectivity problems, as well as tips on how to keep your scanner working like new.
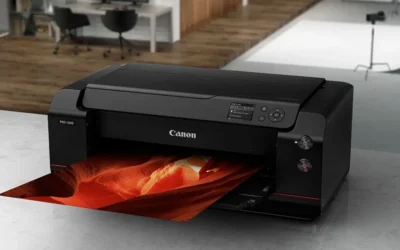
Connecting your Canon scanner to computer may require the right drivers or software. Canon has developed certain specific applications that make scanning even easier and more convenient than just scanning. Some of those applications include IJ Scan Utility or Canon ScanGear, which are designed to allow the scanner to communicate with your computer efficiently. Canon’s applications will allow every scan to be crisp and clear, whether you’re using your scanner for business docs, photos, or creative projects.

Types of Connections Available
Before exploring set-up, it’s helpful to know the two primary ways you can connect your Canon scanner:
1. USB Connection
This is the easiest and most common way to connect your scanner. You’ll simply connect the Canon scanner to the computer using the USB cable that comes in the box, and the computer will recognize the new device and install drivers automatically.
2. Wireless Connection (Wi-Fi)
Modern Canon scanners support wireless connections, allowing you to scan without needing cables. This is a great option for those who want flexibility in their set-up and avoid using cables to instead use the computer or printing program. You can also scan using your smartphone or tablet as you connect to the wireless option!
Steps to Connect Canon Scanner to a Computer via USB
If you’d like a more straightforward setup, the USB connection works best for you. Simply follow the steps below and take care to follow each step in order:
- Remove the scanner from the box and place the scanner on a flat surface that is stable and very close to your computer.
- Attach the power cord to the scanner and plug it into a wall outlet, and turn the scanner on.
- Attach the scanner to your computer using a USB port on the scanner and a USB port on your computer, using a USB cable.
- After you have connected the scanner to your computer, your computer should automatically recognize the device. If your computer does not, you will be prompted to go to Canon’s website and manually download the drivers for the scanner.
- Download the Canon scanner, IJ Scan Utility, or Canon ScanGear on your computer. The scanning software can be found on your desktop or in the Applications folder once downloaded.
- Open any scanning program and try to connect the scanner to your computer. Complete a quick scan. At that point, your Canon scanner is ready to use to scan Photos, documents, and forms to your computer in a few simple clicks!
Connecting Canon Scanner to Computer via Wi-Fi
Wireless connectivity allows for more convenience and flexibility. The steps to accomplish this are as follows:
- Turn on the scanner and verify that your Wi-Fi router is functional.
- On the scanner’s display, open the Wi-Fi settings or “Network Settings” menu.
- Select your Wi-Fi network and enter the password.
- Download and install the Canon IJ Scan Utility from Canon’s website to your computer.
- Open the software, then go to the “Settings” section and select your scanner model.
- Your scanner should appear on the list of available devices. Run a test scan to ensure the connection is successful.
Wireless scanning is especially helpful for a shared device where multiple computers may be scanned from a home or office setting. It also allows you to save directly to a cloud storage service.
Installing Canon Drivers and Software
When figuring out how to connect Canon scanner to computer, a very important step is to install the right driver. If you do not have the correct driver, your computer may not recognize the scanner at all. Follow these steps.
- Go to the Canon Support website.
- Type your scanner’s model number in the search engine.
- Choose the operating system (Windows or macOS) you are using.
- Download both the driver and IJ Scan Utility.
- Run the installer that you downloaded and follow the instructions.
- Restart your computer after everything is installed.
Once everything is installed, your Canon scanner will work on your computer, and you will have added features, like the ability to automatically recognize documents or scan multiple pages
Troubleshooting Common Connection Issues
Your scanner may still experience connectivity issues, even after you have completed all the steps required. Here are a few quick things to try:
- Check cable connection – the USB cable is properly connected and not damaged.
- Restart both devices – a power cycle of both the scanner and the computer could remedy the detection issue.
- Reinstall drivers – outdated or corrupted drivers, which can happen, can cause communication issues. Just download the most current version from Canon’s website.
- Wi-Fi interference – if you are using wireless mode, make sure that the scanner is still within range of the router and that the Wi-Fi signal is stable.
- Firewall or antivirus – on occasion, security software will block communication between scanner and computer. Disable the firewall or antivirus temporarily to test.
If still failing, check to reset the network settings on the scanner and restart the setup.
Best Practices for Smooth Scanning
Once your Canon scanner is connected, you may want to think about a few best practices to take full advantage of your devices:
- Update your drivers – Canon regularly releases updates to remove bugs and increase functionality.
- Make sure the scanner glass is clean – Dust and forensic evidence (fingerprints) impede the quality of the scan.
- Keep your scanned documents organized – Be descriptive in the names of each document you scan and save them in an organized manner to easily find your documents later.
- Use the correct DPI setting – 300 DPI is fine for text, while 600 DPI will grant you added clarity for photographs.
By simply keeping a few best practices in mind, you will get quality and functionality every time you scan.
Conclusion
Knowing how to connect Canon scanner to computer allows you to make the most of your device for everyday tasks. No matter if you connect the machine through a USB or wireless connection, those steps are easy to follow. Once you install the right drivers and Canon software, you will have created a link between the machine and your computer, which will let you unlock all capabilities. Always remember to update drivers and software when prompted to ensure your machine gives you its best ability! When it is all in sync, your Canon will work for you effortlessly and allow you to convert all the important documents, photos, or creative projects into a digital format.